Creating and managing rooms within your location is important for scheduling classes and managing capacity. Follow these steps to add or edit a room.
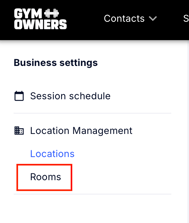
Step 1: Navigate to Business Settings
- Log in to your GymOwners.com account.
- In the top-right corner of the dashboard, click on the person icon.
- From the dropdown menu, select Business Settings.
Step 2: Access Room Settings
- Within Business Settings, click on Rooms.
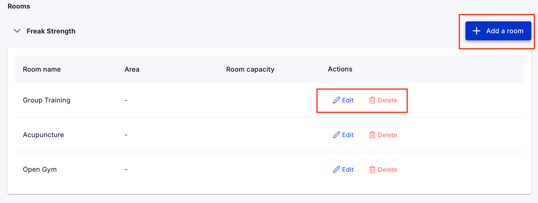
Step 3: Add or Edit a Room
- To add a new room, click on the Add a Room button.
- If you need to edit an existing room, find the room you want to edit and click the Edit icon next to it.
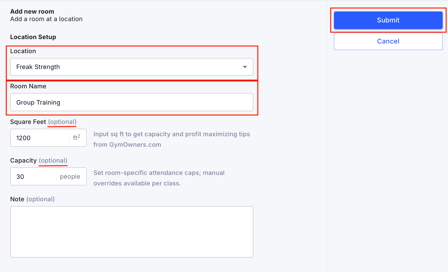
Step 4: Fill Out Room Information
Once the Add New Room or Edit Room page opens, fill in the following information:
- Location: Select the location for the room from the dropdown (e.g., Freak Strength).
- Room Name: Enter the name of the room (e.g., Cardio Studio, Weight Room).
- Square Feet (Optional): Input the room's size in square feet. This can help you optimize capacity and get profit-maximizing tips from GymOwners.com.
- Capacity (Optional): Enter the room’s capacity. You can set specific attendance caps for classes held in this room. Manual overrides are available for individual classes if needed.
- Note (Optional): Add any notes relevant to the room that may be useful for your staff or scheduling.
Step 5: Submit Your Changes
Once all the necessary information is filled out, click Submit in the top-right corner.